How do celebrities remove facial hair??
Perhaps being trapped in our houses for two years during quarantine has made us more bold at DIYing our face and body care. Or maybe it’s the world of information we live in now that offers more how-to instructions than ever before. If you're a do-it-yourselfer; this one's for you.
Someone asked me recently, “How do celebrities get rid of facial hair?” My response; “Like everyone else!:
- Dermaplaning
- Shaving
- Waxing
- Lasering
- Threading
- Electrolysis
- Nair
- Or that awful sandpaper thing from QVC…" Ew. And no.
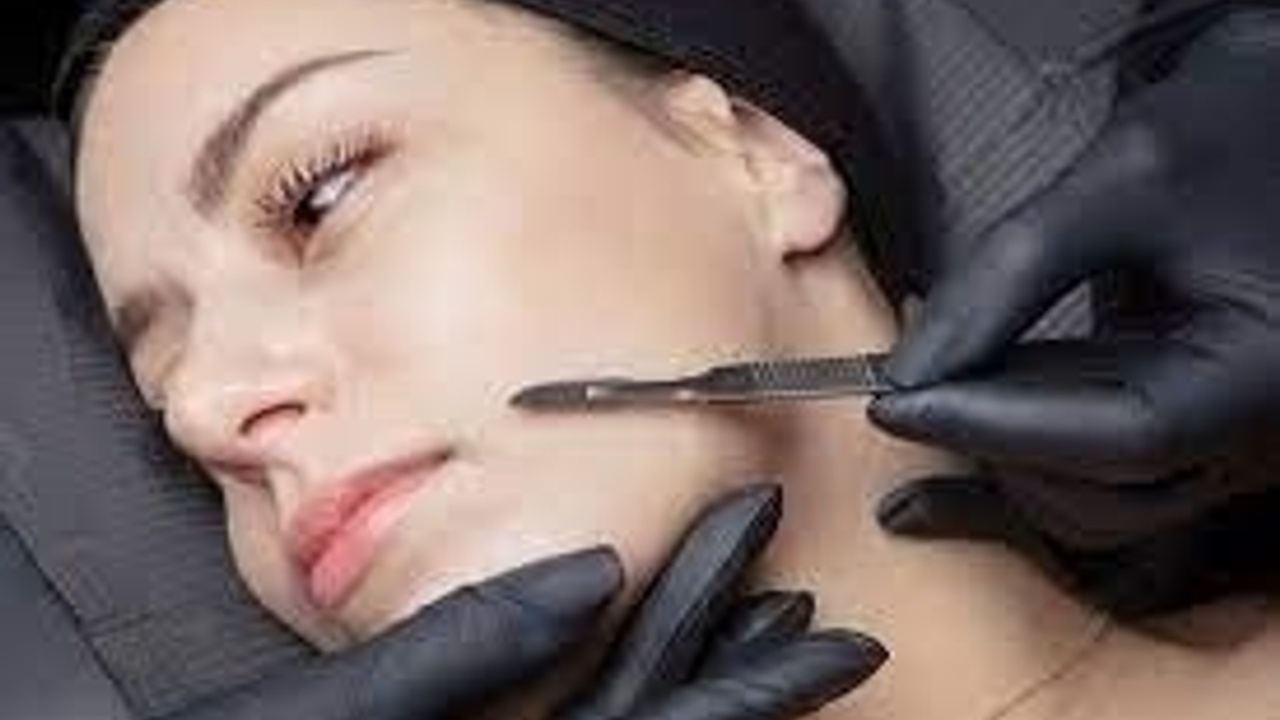
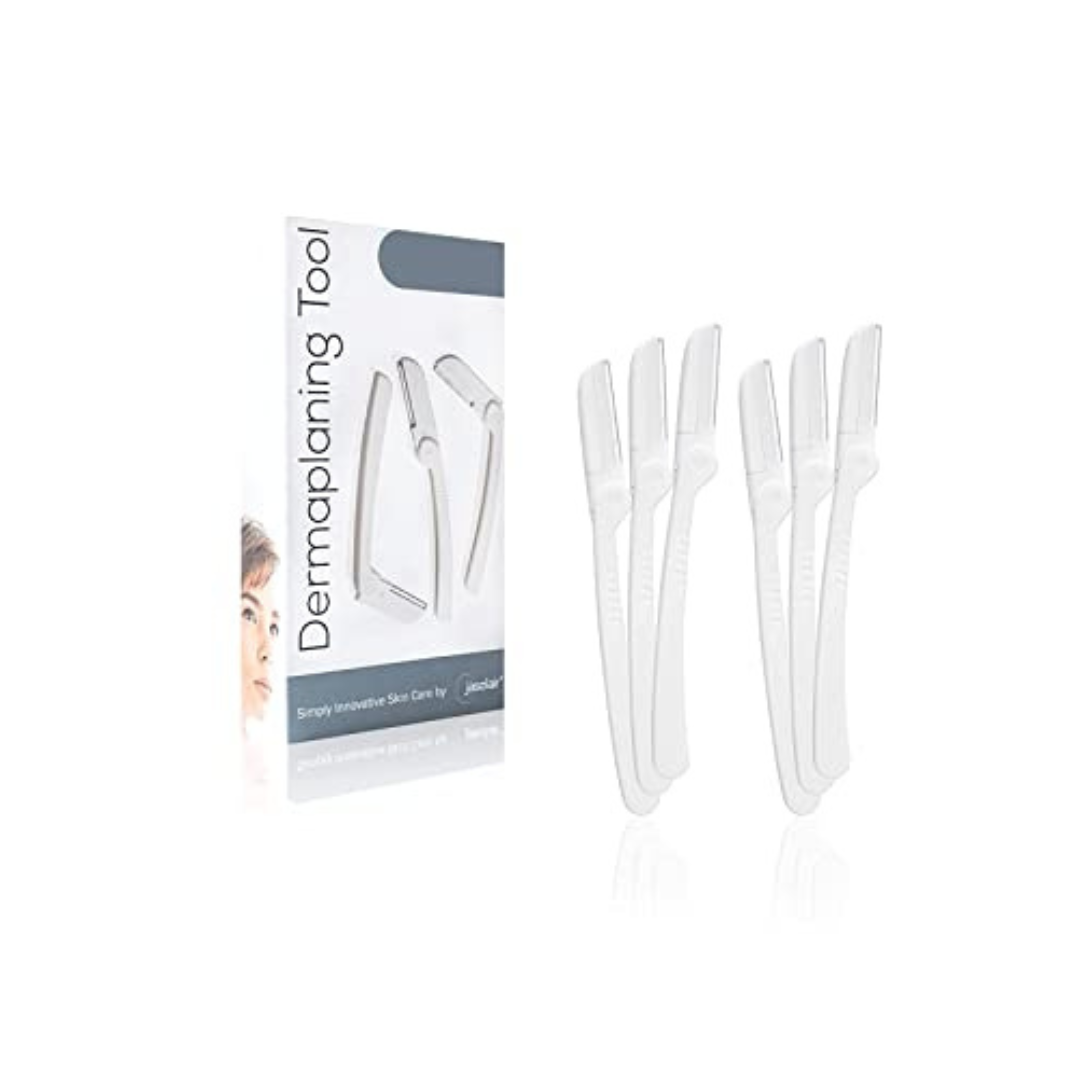
The purpose of using a scalpel type of blade like the one shown above; when you lay the blade at a 45-degree angle to the skin you will slough off a layer of dead skin cells. This signals the repair system of your amazing body to create new ones. And therein lies the magic of it.
A salon dermaplaning can cost up to 200.00 depending on where you live, and you can buy the scalpel-style blades that I use, for 7.97. Click the photo below.
But that doesn’t mean everyone should pick up a scalpel and try this. Before I give you the specific how-to steps—I have to give you a warning to be careful. As I type this, I have a tiny micro cut on the side of my nose that’s healing from DIY dermaplaning two days ago.
The operative part of that sentence is “on the side of my nose”. The difficulty factor goes way up when the contours of your face change, as in; around your nose. So start on the flattest part of your face, just under your cheekbone first.
Check yourself! Never attempt dermaplaning when:
- You are in a hurry
- You are stressed, frustrated, or upset
- Your PMS is in high gear
- You don’t have enough light
- Your focus is somewhere else
Be sure to
- Lay out a clean white cloth and place everything you’ll need sterilized and ready to go on it
- Rinse the blade in alcohol before and after each use and allow it to dry
- Wash your face first
- Using a mild toner on a 100% cotton round and go over your entire face
Then:
Lay the blade at a 45-degree angle to the skin and press gently as you start on the flattest part of your face. Draw the blade upward, lifting up and off the skin at the end of the stroke. Return to where you started and repeat the same stroke three times. Then in that same area of your face, go from top to bottom, with the same technique; lifting away from the skin at the end of the stroke. Repeat three times. Depending on your ergonomic situation, go from right to left and left to right. This can be a challenge and if it feels too awkward, like you're not in charge of the blade then, skip going from side to side.
You will have gone over the same area in four directions. Avoid any blemishes, raised moles, your hairline, and brows. Some redness is normal and should clear in about an hour. If the redness lasts longer than an hour, use a lighter touch—less pressure with the blade.
Apply hyaluronic acid to your face and neck. Do the facial thumps and cheekbone lifts that we do on Tuesdays.
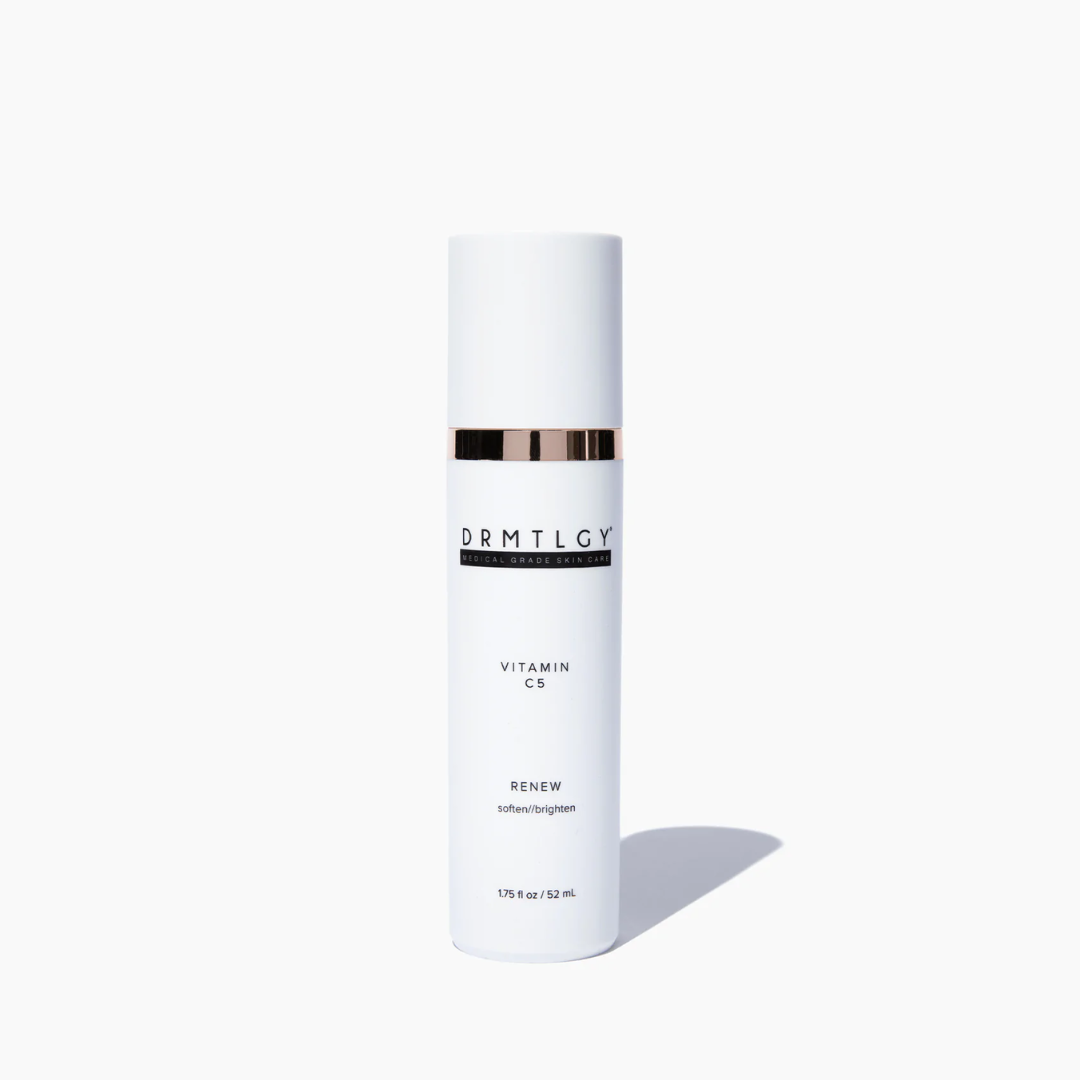
A perfect follow-up to this treatment is Vitamin C cream--massage it in gently. See below for the one I use from DRMTLGY and use the HEYLOA10 discount code. Or use a light moisturizer—make sure it’s clean, and without toxic additives.
I love this treatment!
Let me know how you like it. It should make you look refreshed and glowing like you’ve just come from a high-priced salon treatment.
